




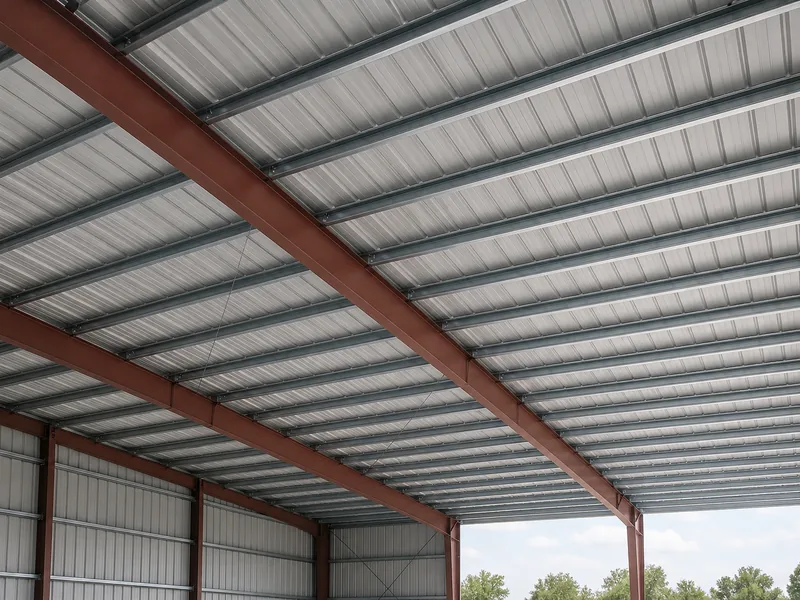
A purlin is a horizontal secondary framing member that runs across the rafters or trusses of a roof and gives the roof covering something to fasten to. In a steel building it carries the load from the roof panels back to the primary frame, and it almost always takes one of two cold-formed shapes: a C-section or a Z-section. That single job, bridging the gap between the roof skin and the main steel, is why purlins appear in nearly every metal building drawing. Buyers rarely think about them until a quote lists “C/Z purlins” as a line item.
The scope here stays on the roof, with a short detour to the walls. The sections below cover what a purlin does, how C and Z shapes differ, and the depth, gauge, and spacing decisions behind picking one. None of it sizes your specific roof or replaces a stamped engineering drawing; span and load math belongs to your engineer and local code.
How a purlin carries the roof
A purlin’s whole purpose is to move roof load along a path: panel to purlin, purlin to rafter or truss, then down the columns to the foundation. The roof covering can only span a limited distance on its own — whatever types of metal roofs sit on top — so purlins break that distance into manageable bays and keep the panels from sagging between the main frames. Strip the purlins out, and a steel frame spaced 20 or 25 feet apart would have nothing to attach the sheeting to.
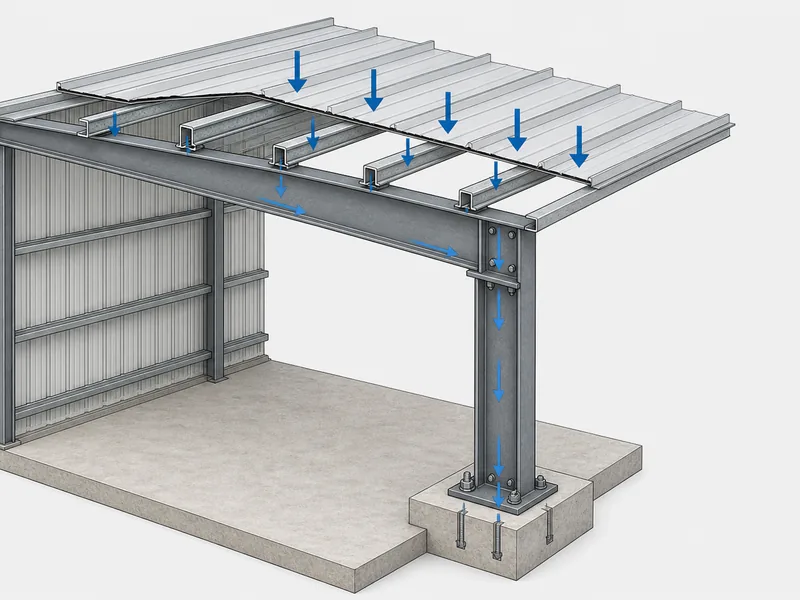
The load path is also why purlins are called secondary framing. The rigid frames, rafters, and columns are primary structure; purlins, along with their wall-mounted cousins, are the secondary layer that ties the skin to the bones. As one of the standard metal building components, they are sized to handle the roof’s own weight, live load, and the environmental loads the roof sees in service, from dead, live, and snow loads to wind uplift.
Wind uplift is the case people forget. A roof that comfortably carries snow can still try to peel upward in a storm. The purlin-to-frame connection resists that uplift, so the clips and fasteners at each support deserve as much attention as the purlin section itself.
Purlin vs. rafter and girt
Rafters and purlins are not the same thing, even though both live in the roof. A rafter, or the top chord of a truss, is a primary member that follows the slope from eave to ridge; a purlin runs horizontally across those rafters, perpendicular to the slope, sitting on top of them. The rafter sets the roof shape and roof pitch, while the purlin fills the field between rafters.
A girt is the same idea turned onto the wall. Where a purlin supports roof sheeting, a girt supports wall cladding, and the two are often rolled from the same C or Z stock. That is how a single section can serve as a roof purlin in one part of a building and a wall girt in another. If a drawing labels a member “girt,” it belongs on the wall; “purlin,” it belongs on the roof.
C-purlins vs. Z-purlins: the two main sections
C-purlins and Z-purlins do the same job but connect differently, and that difference drives most of the selection. Both are cold-formed from coil, folded cold rather than hot-rolled, which keeps them light, straight, and easy to drill, cut, and bolt on site. The shape of the fold changes how they behave at the supports.
C-purlins
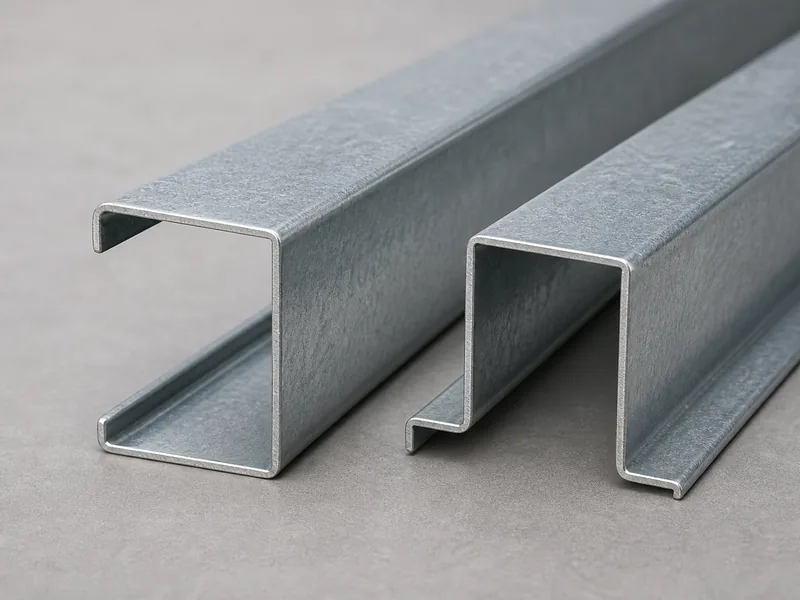
A C-purlin has a flat web with two flanges turned the same way, so its cross-section reads like the letter C. The symmetry makes it simple to lay out and fasten, and it sits flat against a wall, which is why C-sections are the usual pick for girts and for single-span roof runs on smaller buildings. Where each purlin simply spans from one frame to the next without continuing past it, a C handles the job cleanly.
Z-purlins
A Z-purlin turns its two flanges in opposite directions, so two of them can overlap at a support. That overlap, called lapping, lets one purlin continue into the next across the interior frames and form a continuous line instead of a row of separate beams. The lapped zone doubles up exactly where bending forces peak, over the support, so a Z roof shares load more efficiently and reaches longer effective spans. That advantage is why larger buildings and multi-bay roofs lean on Z-sections.
Choosing between C and Z
The choice between C and Z usually follows the span and how many bays a purlin must cross. Short, single-span runs and wall girts favor C; long roofs and continuous multi-span layouts favor Z because of lapping. The table sums up where each fits.
| Dimension | C-purlin | Z-purlin |
|---|---|---|
| Cross-section | Symmetrical C, flanges same direction | Flanges opposite, nests and laps |
| Support connection | Butts at each frame (simple span) | Laps over the frame (continuous) |
| Load sharing | Per bay, independent | Shared across bays through laps |
| Typical fit | Girts, smaller buildings, single spans | Larger buildings, long or continuous roofs |
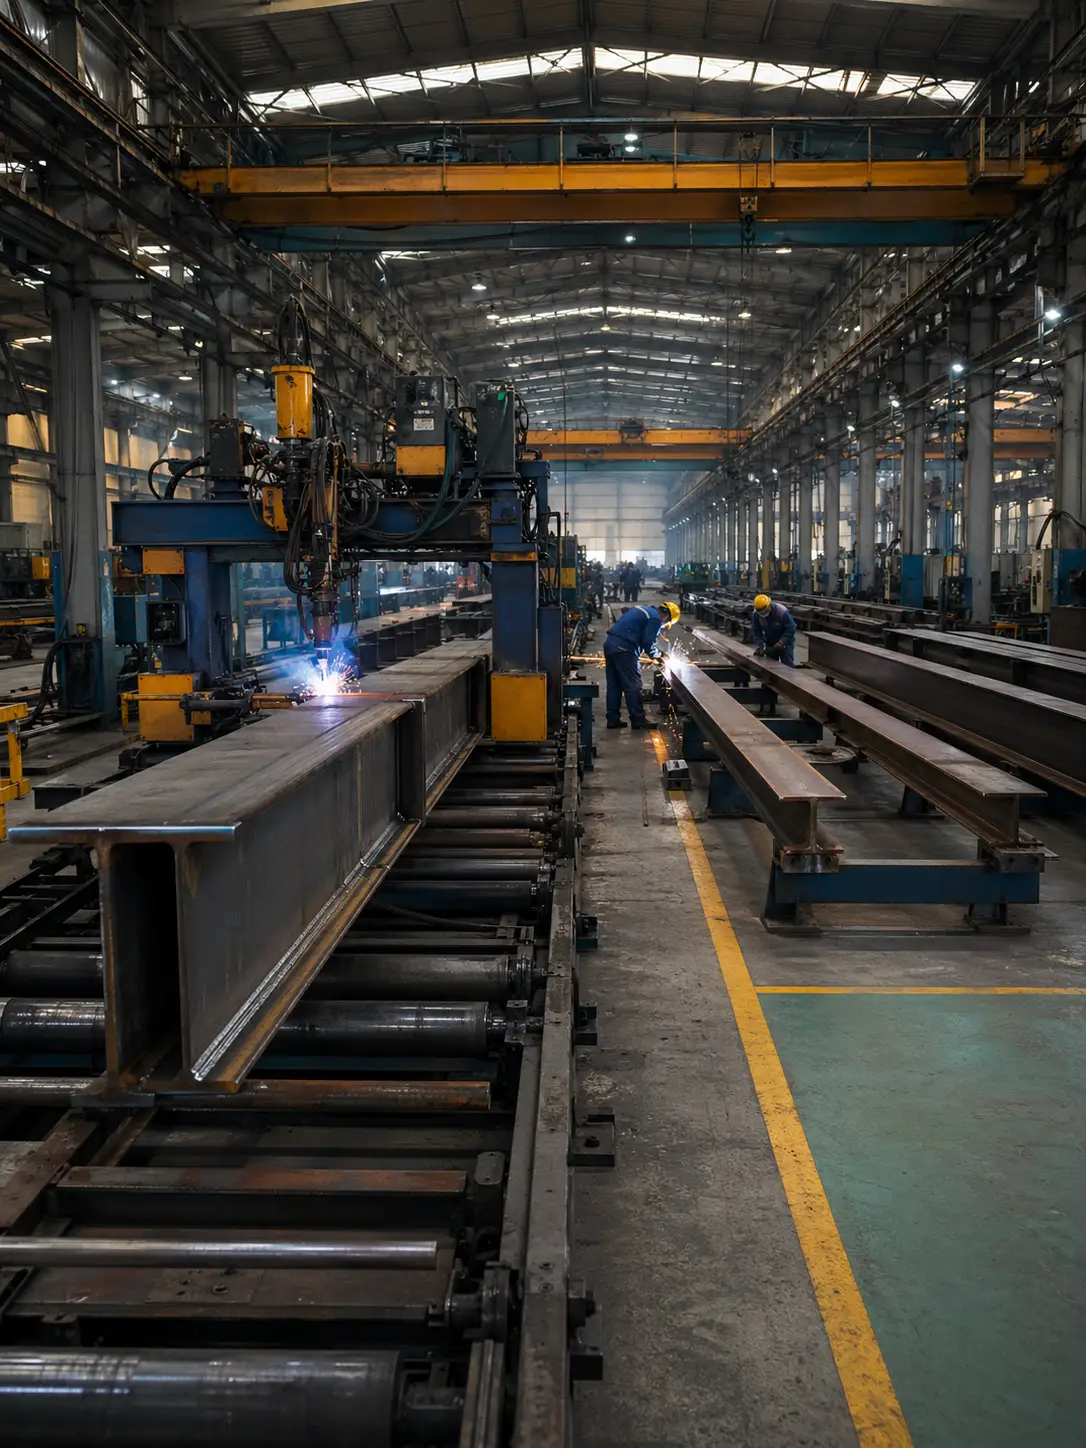
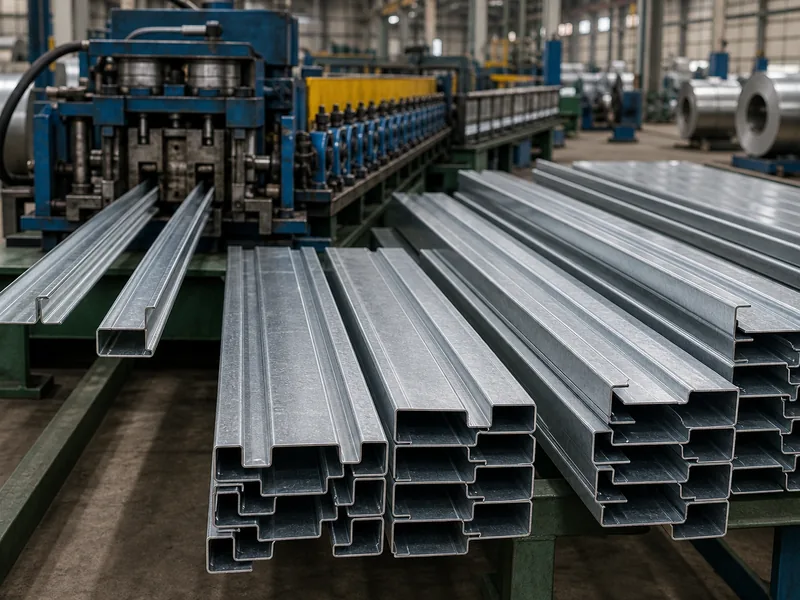
Both shapes come off the same kind of cold-rolled steel framing line. KAFA, for instance, runs a dedicated C/Z-section purlin line at its Qingdao plant alongside its H-beam and box-section production, so a building’s primary frame and its purlins can be cut, punched, and finished together.
Sizing, spacing, and the loads behind them
Purlin depth, gauge, and spacing are set together, because each one trades off against the others. Depth, the web height, commonly runs from about 4 to 12 inches: a small utility roof might use a 4- or 6-inch purlin, while a wide, heavily loaded building can call for 10- or 12-inch sections. Gauge, the steel thickness, usually sits in the 12 to 16 range, where a lower gauge number means thicker, stronger steel. A deeper or thicker purlin spans farther or carries more, so it can be spaced wider; a shallower, lighter one has to be placed closer together.
Spacing typically lands around 2 feet (24 inches) on center for metal roof purlins, but the working range is wide. Heavy snow or high wind pushes spacing tighter, into the 12-to-18-inch zone, so the panels do not deflect between supports; some lightly loaded agricultural roofs open up to 4 feet or more. The right figure depends on the panel, the span, the local load, and the climate, which is why these values get fixed during steel building design rather than read off a generic chart.
Published spacing ranges are a sanity check, not a spec. The depth, gauge, and spacing on a permitted building come from a load calculation against the local building code, and a supplier or engineer should confirm them before steel is ordered.
Finish and service life
Purlins ship in one of two finishes, and the difference is corrosion protection versus cost. Galvanized purlins carry a zinc coating that resists rust and holds up in damp or coastal air; red oxide (prime-painted) purlins cost less but offer thinner protection and suit dry, enclosed, or conditioned interiors. With the right coating and basic maintenance, cold-formed steel purlins last for decades, but the finish has to match the environment. In a humid or unheated building, galvanizing is the safer call, since a primed section tends to rust at the laps and fastener holes first.
Installing purlins: laps, bridging, and common mistakes
Three details decide whether a purlin run performs in service: the lap, the bracing, and the fastening. On a lapped Z roof, the overlap at each support is generally sized at roughly 15 percent of the span and should not drop much below about 10 percent, because the lap is doing real structural work, not just joining two pieces. Cut that lap too short and you lose the continuity that made the Z section the right call.
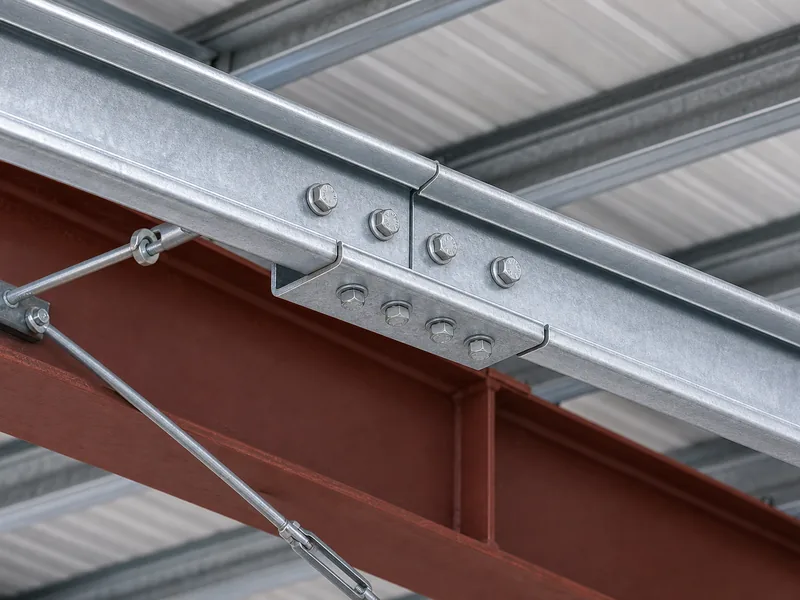
Bridging, meaning rows of small braces or sag rods run between purlins, keeps thin sections from twisting or rolling over before the roof sheeting goes on, and at least one row per bay is standard practice. The other recurring problem is spacing. Open the purlins too far apart for the panel and load, and the roof sags or oil-cans between supports, which is far cheaper to avoid on paper than to fix after the metal is up. Predrilled or pre-punched purlins help, since holes located in the shop keep a field crew from drilling in the wrong place and weakening the section.
Specifying the right purlin
Specifying a purlin is an order-of-operations problem, not a single pick. Lock the roof panel and the governing loads first, because they set how far a purlin can span and therefore how closely it must be spaced. Decide the section next: C for short single spans and girts, Z where lapping buys continuity across a long or multi-bay roof. Only then settle depth, gauge, and spacing, and have those numbers checked against the local code before the order goes out. Run that sequence in order and the purlin stops being a mystery line item and becomes a sized, traceable part of the roof’s load path.
FAQ
What is the difference between a purlin and a rafter?
A rafter is primary roof structure and a purlin is secondary. The rafter, or truss top chord, runs up the slope from eave to ridge and carries the main roof load; the purlin runs horizontally across several rafters and supports the roof panels between them. A roof needs both: rafters to define the frame, purlins to fill the field.
How far apart should roof purlins be?
A common starting point is about 24 inches on center, but the correct figure depends on the panel and the load. Heavy snow or wind zones tighten that toward 12 to 18 inches, while lightly loaded agricultural roofs may open to 4 feet. Confirm spacing against the panel manufacturer’s span tables and the local code rather than a generic number.
What size purlin do I need?
Purlin size follows span, load, and spacing, so it is set by calculation rather than rule of thumb. Depths commonly range from 4 to 12 inches and thickness from about 12 to 16 gauge, with bigger, more heavily loaded buildings moving toward the deep, thick end. The specific size should come from a load calc against your building code, where an engineer or supplier sizes it for your roof.
Should I use C or Z purlins?
Use C purlins for short single spans and wall girts, and Z purlins for long or continuous multi-span roofs. The deciding factor is lapping: Z sections overlap at the supports to act as continuous members, which gives larger roofs their longer effective spans. For a small building where each purlin spans one bay, a C section is simpler and usually enough.
Can purlins be used on walls?
On a wall, the same member is called a girt rather than a purlin. C and Z sections handle the secondary-framing job on both surfaces, purlins carrying roof panels and girts carrying wall cladding, and they are frequently rolled from identical stock. So a “wall purlin” in casual speech is really a girt, even though the steel is the same.
Further Reading
- Cold-Formed Steel Engineers Institute (CFSEI) — Technical notes and design guides for cold-formed steel members, the category that C and Z purlins belong to.
- Metal Building Manufacturers Association (MBMA) — Industry resource on metal building systems, where purlins serve as the roof’s secondary framing.
- American Society of Civil Engineers (ASCE) — Publisher of ASCE 7, the standard for the snow, wind, and dead loads that drive purlin size and spacing.